Category: USA

  • U.S. Navy Power: From Carriers to the Beaches

    When it came to naval power in World War II, no force projected strength across the oceans quite like the U.S. Navy. From the island-hopping campaigns in the Pacific to the D-Day landings in Europe, American innovation in aircraft and landing craft proved decisive.

    I’ve recreated some of the most iconic U.S. Navy machines — the landing craft that carried men to the beaches and the aircraft that aided the marines to victory.

    LCVP – The Higgins Boat

    Known as the “Higgins boat,” the Landing Craft, Vehicle, Personnel (LCVP) was essential for amphibious invasions. With its front ramp, it could unload troops and jeeps directly onto the beach. From D-Day in Normandy to the Pacific islands, the LCVP became a symbol of Allied landings.

    And that’s exactly what the Lego version can do too, it’s ramp can lower to release the Brickmini troops onto the beach, where you can recreate your own D-Day diorama.

    LCM – Landing Craft, Mechanized

    The LCM was larger than the LCVP and designed to carry tanks, vehicles, and heavy equipment ashore. It allowed the U.S. Navy to land armor directly onto contested beaches, supporting infantry with much-needed firepower. In the picture above, our LCM can fit one tank with a 1×3 stud width, or two Willys jeeps. Tutorial below:

    Vought F4U Corsair – The “Whistling Death”

    The Corsair was one of the most iconic carrier-based fighters of WWII. With its distinctive gull wings and powerful engine, it dominated the skies over the Pacific. Japanese pilots nicknamed it “Whistling Death” for the terrifying sound it made in dives. I was quite proud to recreate the canted wing effect in such a small scale, which was a defining feature of this aircraft. Another cool thing is the spinning propellers, which all of the aircraft feature.

    Douglas SBD Dauntless – The Dive Bomber That Turned the Tide

    The SBD Dauntless was the Navy’s main dive bomber and proved decisive in the Battle of Midway, where its pilots sank four Japanese carriers. Slow but rugged, the Dauntless earned its place in history as the plane that changed the course of the Pacific War.

    Grumman F6F Hellcat – The Carrier Workhorse

    The Hellcat was the backbone of the U.S. Navy’s fighter force. Built to be tough and reliable, it racked up more aerial victories than any other U.S. naval aircraft — over 5,000 enemy planes shot down. Designed to dominate Japanese Zeroes, it quickly became the Navy’s most successful fighter.

    TBF Avenger – Torpedo Bomber Power

    The Grumman TBF Avenger was a heavy torpedo bomber that gave the U.S. Navy the punch it needed against Japanese ships and carriers. With a crew of three, folding wings, and a bomb bay that could carry a torpedo or bombs, the Avenger combined toughness with versatility. It made its combat debut at the Battle of Midway and went on to become one of the most produced naval aircraft of the war.

    This is also the largest of the naval fighters/bombers as you can see and has two machine gun turrets, top and bottom, which I use minifig hands to replicate.

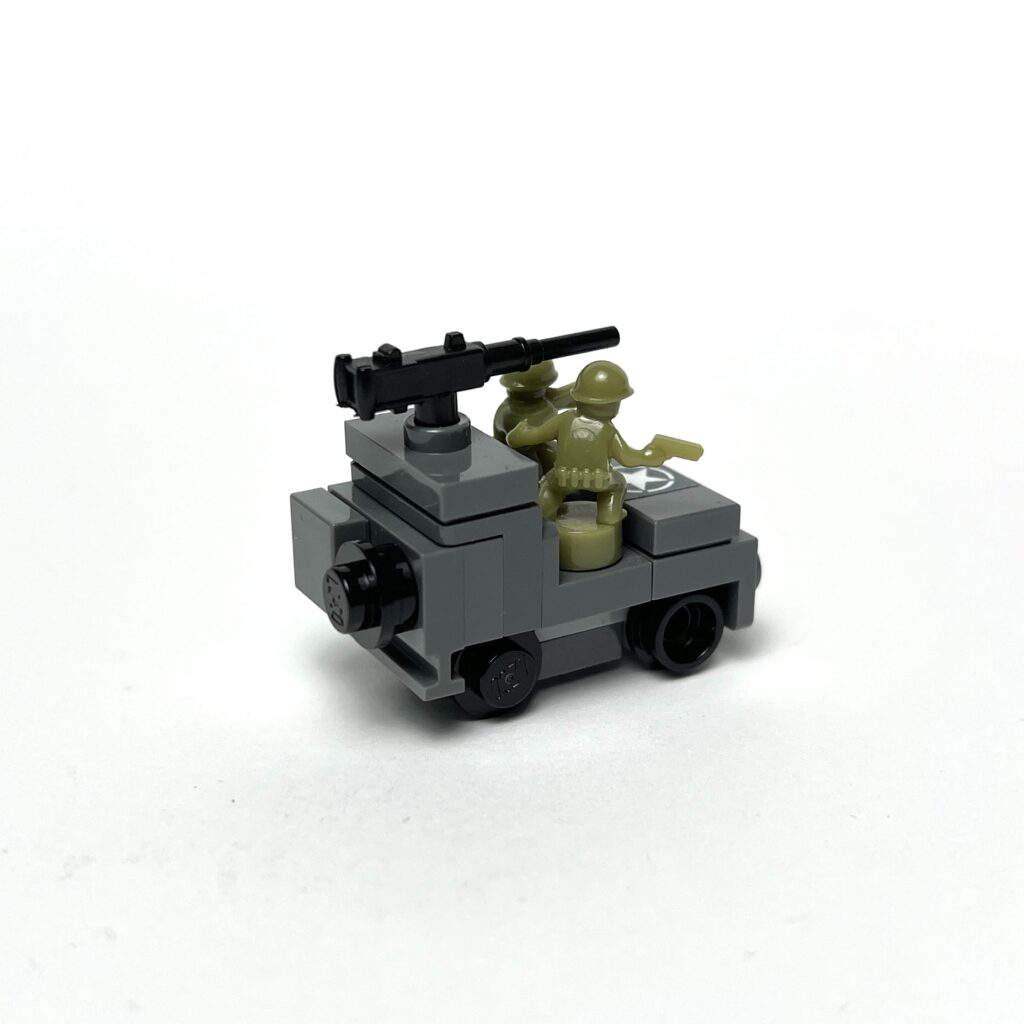
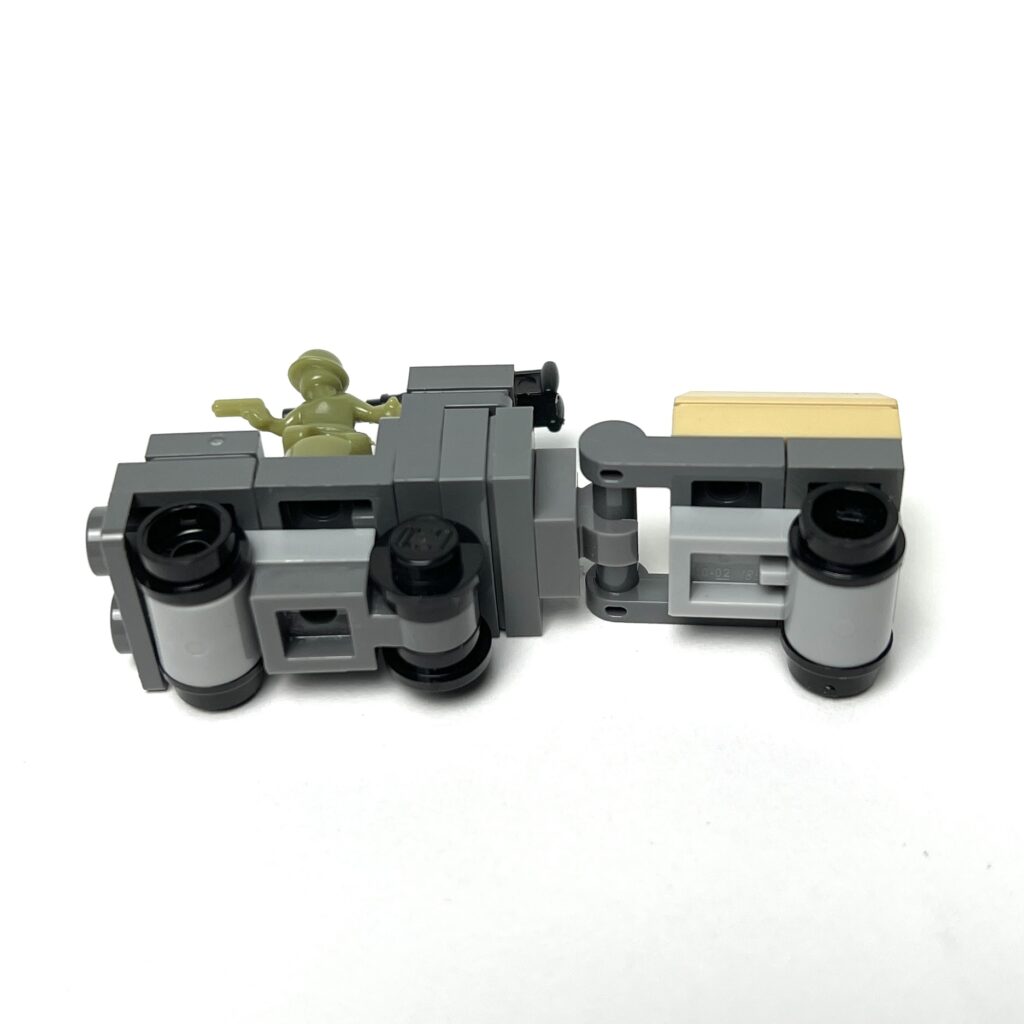
    DUKW – The Amphibious Truck

    Nicknamed the “Duck,” the DUKW was a 6-wheel drive amphibious truck used by the U.S. military to ferry cargo, troops, and supplies from ship to shore. Unlike landing craft, the DUKW could drive directly off the beach and continue inland, making it invaluable for logistics during invasions. Over 20,000 were built, and their versatility made them a workhorse in both the European and Pacific theaters.

    PT Boat – The Fast Attack Craft

    Small, fast, and armed with torpedoes, Patrol Torpedo (PT) boats became famous for daring hit-and-run tactics against larger enemy ships. Crewed by just over a dozen men, these wooden boats relied on speed and surprise rather than armor. One of the most famous, PT-109, was commanded by future U.S. President John F. Kennedy.

    If you like my post on this subject, stay tuned because there will many more of these coming! Also, leave a comment and let me know what else you would like to see in future posts. Thanks for reading!

    Tip: Bars and clips can be used in many ways, and can even help you build upside down.

  • The Mustang That Could Soar

    I always wondered why they named the North American Aviation P-51 “Mustang”. Horses can’t fly right?

    I digress, the P-51 was a long-range, single-seat fighter/fighter-bomber used in WWII and the Korean War. It used an engine called the Packard V-1650 Merlin and was armed with six M2 Browning machine guns, damn, that’s a lot of fire power for an airplane of that era.

    The Mustang was very good in a dog fight and would escort bombers during raids over Germany. It saw battle during the North Africa, Mediterranean, Italian and Pacific theatres too and apparently destroyed 4,950 enemy aircraft by the war’s end.

    P-51's save the day in Saving Private Ryan
    P-51’s save the day in Saving Private Ryan

    The first time I saw it was in Saving Private Ryan, when Tom Hanks was on the brink of death facing a Tiger 1 and a P-51 swooped in to destroy it.

    Christian Bale's character with a P-51 behind him
    Christian Bale’s character with a P-51 behind him

    Or who can forget the scene in Empire of the Sun when Christian Bale shouts “P-51 Mustang, Cadillac of the sky!” as a squadron flies in to liberate the POW camp?

    I had built a P-51 before in a slightly larger scale(1:90) so it wasn’t too difficult to miniaturise it further. Some details are very hard to include when working in a small scale but I managed to fit wheels and guns into this MOC, both done using a 1×1 round plate with bar, a very versatile piece.

    This aircraft comes in many paint schemes and the first one I made is what I believe to be from the 375th Squadron, but you could easily change out a few pieces to get the squadron colours you like.

    For example, the second one with the blue nose is from the 487th Fighter Squadron, and I added in some stickers which I printed out on label paper and cut out. It’s a painstaking process but I did it just to add that little extra detail, although a printed tile would be much better on the eyes.

    I also used black and white tiles as the “invasion stripes”, which the allies used to differentiate between friend or foe.

    The last one is from the P-51 Tuskegee Airmen Red Tail Squadron, and was featured in the movie Red Tails. It was only after watching that film that I learnt about the brave African-American pilots who risked their lives during WWII, a period where segregation was still predominant. It’s an inspiring drama that is worth a watch.

    Red Tails escorting bomber aircraft
    Red Tails escorting bomber aircraft

    Here’s how to build my version of the P-51 Mustang:

    If you like my post on this subject, stay tuned and subscribe to my mailing list because there will many more of these coming! Also, leave a comment and let me know what else you would like to see in future posts. Thanks for reading!

    Tip: Using 1×1 modified bricks with studs gives you choices when building sideways so play around with these useful pieces, especially headlight bricks!

  • The Little Sherman That Could

    Today I want to talk about probably the most popular tank of World War II, the M4 Sherman.

    The M4 Sherman was the most widely used medium tank harnessed by the Allies during that period. It was named after General William Tecumseh Sherman who served during the American Civil War in 1861.

    This tank was mass produced by the United States and was an important piece of machinery, not because it was better on the battlefield but because the Allies could manufacture these at a faster pace and was able to repair and replace parts with greater efficiency. This advantage was a turning point for the Allies during the war.

    Here I’ve made the most basic version, and while I didn’t plan on copying anyone, similarities in this scale(1:120) are unavoidable. That said, I used a different technique to create the tracks(which is a bit of an overkill), by using 1×2 round plates and I found that it is more modular than the technic beam piece normally employed. I can go from 5, to 6 or 7 studs with ease. It’s looks more detailed even on the underbelly, which I also tried to make convincing in this scale. I actually used curves and plates in my initial design for the tracks but scrapped it after developing this technique instead. I think it’s just more visually appealing because you can have a very slight bend on the “tracks” and with the holes, it kind of looks like wheels.

    I also remember seeing in one of Brick Mini’s photos of how a Harry Potter wand would be useful as a barrel and that element was perfect for this scale. The stickers and nano figure elements of course can be found at Brickmania and Brick Mini.

    Another feature of the Sherman was how adaptable it became, which saw many forms during its service. There are too many to name here, but one of my favourites include the M4A3E8(Easy Eight).

    If you’ve watched the movie Fury, you would have seen this bad boy in action against the fearsome Tiger 1. (Note to self, I have to make a diorama of that at some point!)

    I then made some modifications on the original build and upgraded the gun, (the most prominent change) and also added in that M2 Browning to complete the look.

    There is also the Sherman DD(duplex drive), which is an amphibious version used during the Normandy landings. You’ll recognise it because of the protruding snorkels(which was very difficult to add to the small body). Finally I squared it off with the some tan tiles, held together by 1×1 brackets.

    I researched a little bit more and saw they had a minesweeper variant as well! This one was a little easier to make as it was just an attachment consisting of 4 pieces.

    That short chain piece really came in handy, but you could also use other things like minifigure hands or even a technic pin in dark bluish grey that could do the job.

    The last variant I wanted to build was the Rocket Launcher T34, and the rocket attachment was a quick assembly using claw pieces clipped onto a 1×3 bar. I modified the turret by adding brackets which would hold the thing in place. I used the shorter clips from Brickmania because it looked nicer, but if you don’t have those you could just stick to the claw piece(48729b).

    All these models could be used in the Micro Brick Battle game and here’s a tutorial if you want to build one:

    There is already an extensive archive of models they have created before, but I’m just adding on to that world piece by piece.

    If you like my post on this subject, stay tuned and subscribe to my mailing list because there will many more of these coming! Also, leave a comment and let me know what else you would like to see in future posts. Thanks for reading!

    Tip: Every plate matters when building in micro-scale. 1 brick = 3 plates height and 2.5 plates width.

  • CCKW – The Deuce and a Half That Carried the War

    Let’s start our second post with a truck known as the GMC CCKW a.k.a “Jimmy” or “Deuce-and-a-half”, which is a companion piece to my first post about the Willys Jeep.

    Three variants of the CCKW Truck

    Jimmy was a 2 1⁄2-ton ton 6×6 cargo truck that saw service during WWII and the Korean War. This truck was an important piece of equipment as it supplied the Allied forces during their Normandy campaign and the remainder of the second world war.

    A bit of trivia, the letters CCKW all mean something and was part of GMC nomenclature; “C” – designed in 1941, “C” – conventional cab, “K” – all wheel drive, “W” – dual rear axles.

    These trucks had many variants including, dental operating van, dump truck, fire engine, surgical van and water purification van among many others. I just found it too interesting to not mention these.

    Anyway, I got to work starting with the basic variant and boy did I have to tackle some issues trying to miniaturise a truck. After trying several types of wheels and placements, I eventually went with the skateboard wheels and used clips to hold it to the body of the truck. I employed a few SNOT(studs not on top) techniques for this build as you can see.

    My main issue was getting a 2-stud-wide plate to fit onto a 1 stud body and after experimenting, it fit together pretty nicely with the help of jumper plates.

    Once I was happy with the first one, I made a second version with a dark tan canvas and I’ve seen some versions with a mounted gun on top of the cabin so I added that in. You can also remove the canvas top and add a trooper there.

    The third one, which turned out to be my favourite, is the troop carrier variant and does what it was intended to do. It can hold up to eight nano-soldiers and also uses a variety of brackets and snot bricks in order to get the extra stud coverage.

    I built these trucks to be used as a game piece for Micro Brick Battle but have no idea how to integrate it yet, so much more research to do on that.

    If you like this post, stay tuned and subscribe to my mailing list to get notified when a new post drops! Also, leave a comment and let me know what else you would like to see in future posts. Thanks for reading!

    Here’s a Youtube tutorial if you are interested to build it:

    Tip: Jumper plates are very useful to get an offset from 2 studs to 1, 3 studs to 2 etc. There are different types of jumpers but the most commonly used for me is the 1×2 jumper plate.

  • From Battlefield to LEGO Bricks – Building the Iconic Willys Jeep

    Hello there fellow brick fans and welcome to my very first blog post!

    Today I’ll be sharing my first 1:120 scale model, which is the smallest 4 wheel vehicle in the US Army lineup, and it is none other than the Willys MB(G503), more commonly known as Willys Jeep.

    A little background info, the Willys Jeep was built in large numbers for the United States during World War II(1941-1945) and is an off-road four-wheel drive light utility vehicle. If you’ve watched any WWII show like Saving Private Ryan, Platoon or Band of Brothers, you’ve probably seen this jeep ferrying around troops or supplies.

    So to start my journey into building Micro Brick Battle vehicles, I made this version of the jeep and made sure it could fit some nano soldiers. I quickly found out that to make something so small yet have some functionality is no easy feat. But after some trial and error I ended up with this version you see here.

    Only two points of connection holding this together

    The brackets used for the front look like headlights so I left it open. Then, to finish the model, I added an M2 Browning gun on top and slapped on a sticker to show it’s a US Army vehicle.

    If you are interested to buy these supplementary pieces, you can buy the nano soldiers from Brick Mini, stickers from Brickmania and M2 Browning from our store. The lego parts you can always rummage through your stash or buy from Bricklink.

    I could talk all day about how I made the custom M2 Browning but I’ll just say it was a big pain in the butt and expensive to boot, although they do help to elevate small MOCs like this.

    Of course, I couldn’t stop there, I had to make a few more versions; one with the top cover, one towing a supply trailer and another with a small howitzer.

    The one with top cover cannot fit any men but is nice to look at, whereas the version towing a trailer is just a variation of the jeep with a 1×1 clip attached to the trailer section. Same thing for the one holding a howitzer, I just changed up the clip and bar usage.

    Anyway, if you would like to build one, here’s a tutorial on how:

    Tip: Get to know your brackets, they range from 1×1 to 2×4, come in normal or inverted types. Every one of these can do something a little different.